Go straight to page content
Chicken Road 2

Chicken Road Wins title 2 of 2 · InOut Games · 2025

Our Chicken Road 2 Review of the Longer Ladders

Chicken Road 2 is InOut Games' sequel to the step-based gambling game. You still choose whether to continue or collect after successful progress, but the route lengths and multipliers differ. It is worth reading the numbers afresh even if the original controls already look familiar. A remembered coefficient from the first title will not describe every position here.

Play free demo

Chicken Road Wins research team · How we approach the road numbers

RTP stated by the developer
95.5%
Upper payout amount
20,000 USD · Naira for your personal budget: NGN (₦); USD amounts describe the provider's game limits

Practice balance

Chicken Road 2
Chicken Road 2

Free practice credits. No withdrawals. Adults 18+.

RTP stated by the developer: 95.5% · Upper payout amount: 20,000 USD · Naira for your personal budget: NGN (₦); USD amounts describe the provider's game limits

Read the full title breakdown

The sequel changes the numbers from the first move

InOut released the sequel on 15 April 2025. The long-run house edge is 4.5%.

The sequel has 30 Easy positions, 25 on Medium, 22 on Hard and 18 on Daredevil. Its provider stake range starts at 0.12 USD and ends at 200 USD, with a maximum win of 20,000 USD. These are game figures, separate from a casino's deposit minimum or the amount in your bank account.

This Chicken Road 2 review follows the amounts you see and the decisions you make. A larger ceiling is only a ceiling. A longer road is only a longer sequence of possible crossings. Neither should be mistaken for a promise about what a session will pay.

Make the version name your first check

Look inside the game for Chicken Road 2 and the InOut developer name. The sequel can appear in a lobby close to the original or beside unrelated crossing games. A thumbnail is not a reliable way to distinguish the actual product. Open the rules panel and compare its mode lengths with the sequel figures.

The labels remain Easy, Medium, Hard and Daredevil. That consistency helps navigation, but it can hide changed coefficients if you switch games without looking closely. Use the full title and selected difficulty when comparing a round with a table or asking an account support question.

On a phone, make that identification before a round is active. Enlarging the play area can help you see the title and control labels together. Once the version is clear, you can focus on the actual amount the collect button shows rather than a number remembered from another title.

Easy spreads its ladder over 30 positions

Sequel Easy begins at ×1.01, then ×1.03 and ×1.06. The ladder later includes ×1.98, ×2.12 and ×3.28, before progressing to ×6.50, ×12.08 and the final ×23.24. Those opening increases are small, while the far end is much larger. Read the sequence rather than judging the road by either extreme alone.

The longer route gives more possible decision points before the final tile. It does not make every point accessible in every attempt. After any successful position, the current amount can be collected or exposed to another crossing. The animation does not give you advance knowledge about whether that move will work.

Try Easy in demo with an unchanged practice stake so the changing coefficient remains the only moving part in the comparison. Collect in one attempt and watch the round settle. That tells you how the button behaves without requiring a cash deposit or a trip to the cashier.

Medium reaches ×2,457 across 25 positions

Medium opens at ×1.08 and continues through ×1.21, ×1.37 and ×1.56. Later values include ×4.62, ×10.99 and ×53.82, ending at ×2,457. Its 25 positions sit between Easy's long road and the shorter Hard and Daredevil choices. The opening amount changes before the more dramatic late jumps appear.

A position number is meaningful only with the selected mode. Medium's ladder should therefore sit beside your play window when you compare amounts. If the values look different, check the full game title and mode before assuming a display error. The original uses another sequence even under the same difficulty label.

The final multiplier can create very large arithmetic when multiplied by a high stake. That calculation still needs the 20,000 USD maximum win. Treat the cap as part of the numbers from the start, rather than an afterthought when a calculator produces an exciting total.

Hard and Daredevil start higher and rise faster

Hard offers 22 positions, starting at ×1.18 and ending at ×62,162.09. Daredevil has 18, with ×1.44 at its opening and ×3,608,855.25 at the endpoint. Their shorter roads contain much steeper later increases than Easy. You can see the difference without putting money behind it by comparing the demo ladders.

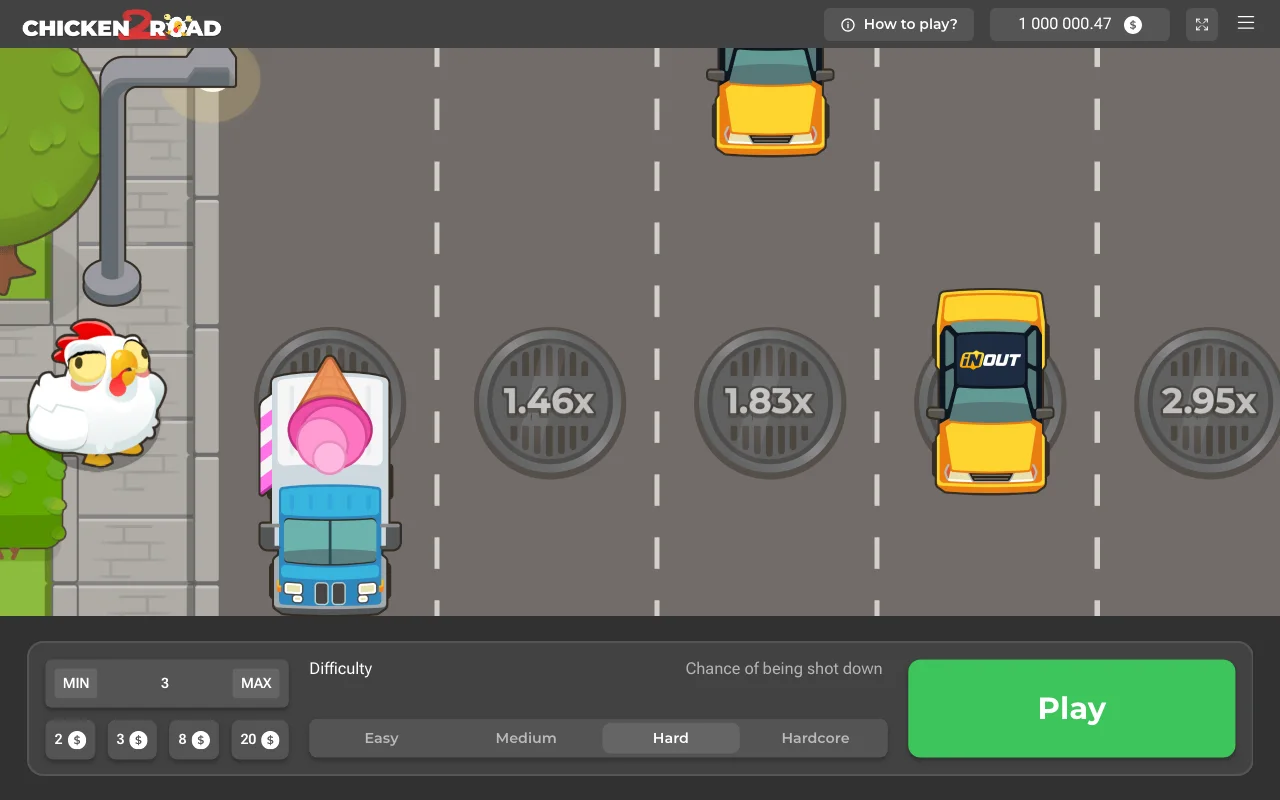
Daredevil's early sequence includes ×2.21, ×3.45 and ×5.53. Hard instead passes ×1.46, ×1.83 and ×2.31 at those opening positions. These values describe different choices; they do not mean you can tap a particular rhythm to force progress. The next move is still resolved by the game's random system.

A sharp multiplier increase can make the screen feel urgent. Slow down enough to read the amount already available to collect. A distant multiplier shows what a later step could return. The collect button lets you accept the amount at the step you have actually reached.

A 0.12 USD floor is a game limit

The provider's sequel bet range is 0.12–200 USD. It belongs to the game and should remain in USD when quoted. A cashier may support a local balance or show a conversion, but that does not give a fixed converted equivalent. Read the stake amount and currency inside the actual game window.

A deposit minimum answers another question: what amount the casino accepts through a particular payment route. The casino can apply separate conditions to cards, transfers or wallet payments. Do not choose a deposit just because the game's lowest round stake looks small. First understand what money will enter the account and how you could request it back.

A allowance puts leisure spending in context. It does not predict the number of rounds or a future withdrawal. Keep any quoted conversion, fees and remaining account balance visible when deciding whether a displayed stake fits that allowance.

The sequel does not have a published InOut RTP

To understand the sequel review, Chicken Road 2 RTP is 95.5% per InOut. There is no replacement percentage to calculate from the multiplier ladder here. A ladder describes possible gross returns at positions, while RTP requires the game's return model across outcomes. Each answers a different question about the game.

A demo session cannot independently verify that theoretical percentage either. A short period with high returns can coexist with many other results across wider play. The largest completed round is especially poor shorthand for a theoretical average, because it says nothing about how frequently every outcome occurs.

If a review or advert attaches a percentage to the sequel, look for the exact title and a direct statement from InOut. A figure belonging to the original should stay with the original. The sequel’s own 95.5% return makes the comparison clear: it is lower than the original’s 98%.

Use the sequel chart only for sequel attempts

The statistics blocks identify the game, difficulty, dates and number of attempts behind their totals. Start with those labels. Easy and Daredevil charts describe different ladders. Also check the title: a chart for the original does not describe the sequel’s rounds. A shared road theme is not a reason to combine them into one result.

The survival display shows progress across those attempts. It is not a button that chooses a safe next position. A point that was never reached during a limited run may still exist on the ladder, while a standout success does not make the same event due again.

When comparing a gross return with a stake, remember that gross includes the committed amount. Keep that definition unchanged across tables, calculators and balance changes. Otherwise two identical round outcomes can appear different simply because one figure includes the stake and another describes only the gain above it.

A cash-out needs a visible control, not a signal

The useful mobile arrangement keeps the mode, stake and collect amount within view. On a compact screen, change orientation or expand the play area before a round begins. Avoid a layout that forces you to scroll away from the amount in order to find the button used to collect it.

The collect button accepts the amount at the successful step you have reached. A signal seller guesses at the next outcome without knowing it. Their prediction cannot reveal the server’s next random result. Do not confuse a suggested target with a value the game has already made available. A proposed target still requires progress to reach it.

When mobile data stalls, let the game display the settled status before issuing another action. Repeated requests can leave you unsure which input was accepted. If an account balance and the game disagree, note the round reference and ask the casino handling the account rather than assuming a reload creates a fresh outcome.

Payments depend on the casino account

A real-money balance belongs to the operator's account system. Registration, identity checks and withdrawal requests take place there. Chicken Road 2 supplies the game round, not an independent bank transfer service. Use the operator's own secure account page for financial tasks rather than a message promising to act for you. Availability on a deposit screen does not automatically mean that the same route handles withdrawals. Read matching-name requirements, currency conversion and charges before sending money; no universal processing time is assumed. The ability to open a demo is a separate matter from permission to gamble for money. Ask clear questions about the operator when a licence or payment term is difficult to understand.

Choose the sequel for its actual differences

The sequel offers more positions in every difficulty and a higher USD payout ceiling. It also starts with a higher minimum provider stake. Those changes are concrete reasons to compare the two games. The name alone does not make it a better option for a particular balance or a particular player.

If you enjoy examining a longer sequence of possible collection points, the Easy ladder is an accessible place to begin in demo. If you want the sharper modes, read their early coefficients as well as their spectacular endpoints. Every mode still asks the same basic question after progress: collect the current amount or attempt another random move.

There is no numerical review score here that can substitute for that choice. Read the controls, stake range and cap together, alongside the lower 95.5% RTP. Then decide whether the format interests you enough to keep exploring, without treating the next round as something owed to you.

Leave room beyond the sequel screen

Adults 18+ only: choose time and money limits before using the sequel review, take breaks and never chase losses.

18+ only. Limit time and spending. Take breaks. Never chase losses.

Progress across these demo attempts

Model: RTP ÷ multiplier. Independently unverified.

Chicken Road 2

Chicken Road 2 · Easy setting
0%50%100% 130 Position on the roadProgress across these demo attempts
  • Demo attempts reaching this point
  • Range of statistical uncertainty
  • Survival under the model
Chicken Road 2 · Easy setting
Position on the roadDemo attempts reaching this pointRange of statistical uncertaintySurvival under the model
196.2%95.11% – 97.06%94.55%
293.93%92.61% – 95.03%92.72%
390.53%88.95% – 91.91%90.09%
487.27%85.48% – 88.86%86.82%
583.13%81.15% – 84.94%83.04%
680.13%78.04% – 82.07%80.25%
776.53%74.32% – 78.61%77.02%
873.53%71.24% – 75.7%73.46%
970.6%68.24% – 72.85%70.74%
1066.73%64.31% – 69.07%67.25%
1163.67%61.2% – 66.06%64.53%
1260.67%58.17% – 63.11%61.22%
1357.2%54.68% – 59.68%57.88%
1454.2%51.67% – 56.71%54.57%
1551.2%48.67% – 53.72%51.62%
1648.13%45.61% – 50.66%48.23%
1745.33%42.83% – 47.86%45.05%
1842.67%40.19% – 45.19%41.89%
1939.53%37.09% – 42.03%38.66%
2036.47%34.07% – 38.93%35.37%
2133%30.67% – 35.42%32.26%
2230.13%27.86% – 32.5%29.12%
2326.33%24.17% – 28.62%25.81%
2423.13%21.07% – 25.33%23.24%
2520%18.05% – 22.1%20.58%
2616.33%14.55% – 18.29%17.72%
2713.07%11.45% – 14.87%14.69%
2810.13%8.71% – 11.76%11.42%
297.13%5.94% – 8.55%7.91%
303.67%2.83% – 4.74%4.11%
Chicken Road 2 · Medium setting
0%50%100% 125 Position on the roadProgress across these demo attempts
  • Demo attempts reaching this point
  • Range of statistical uncertainty
  • Survival under the model
Chicken Road 2 · Medium setting
Position on the roadDemo attempts reaching this pointRange of statistical uncertaintySurvival under the model
189.67%88.02% – 91.11%88.43%
278.6%76.45% – 80.6%78.93%
370.2%67.84% – 72.46%69.71%
461.73%59.25% – 64.16%61.22%
553.8%51.27% – 56.31%53.65%
647%44.49% – 49.53%46.59%
741.4%38.93% – 43.91%40.3%
836.2%33.81% – 38.66%34.48%
930.73%28.45% – 33.11%29.48%
1025.33%23.2% – 27.6%24.81%
1121.4%19.4% – 23.55%20.67%
1217.6%15.76% – 19.61%17.02%
1314%12.34% – 15.85%13.82%
1411.47%9.95% – 13.18%11.05%
158.93%7.59% – 10.48%8.69%
166.27%5.15% – 7.61%6.68%
175.07%4.07% – 6.3%5.04%
183.6%2.77% – 4.67%3.66%
192.8%2.08% – 3.76%2.56%
202.07%1.46% – 2.92%1.77%
211.2%0.76% – 1.89%1.16%
220.47%0.23% – 0.96%0.69%
230.27%0.1% – 0.68%0.36%
240.07%0.01% – 0.38%0.15%
250%0% – 0.26%0.04%
Chicken Road 2 · Hard setting
0%50%100% 122 Position on the roadProgress across these demo attempts
  • Demo attempts reaching this point
  • Range of statistical uncertainty
  • Survival under the model
Chicken Road 2 · Hard setting
Position on the roadDemo attempts reaching this pointRange of statistical uncertaintySurvival under the model
181.67%79.63% – 83.54%80.93%
264.67%62.21% – 67.05%65.41%
352%49.47% – 54.52%52.19%
441.07%38.6% – 43.58%41.34%
531.2%28.91% – 33.59%32.37%
623.67%21.58% – 25.88%25%
717.2%15.37% – 19.19%19.02%
813.07%11.45% – 14.87%14.34%
99.47%8.09% – 11.05%10.56%
106.4%5.27% – 7.75%7.63%
114.67%3.71% – 5.85%5.38%
123.4%2.6% – 4.44%3.7%
131.93%1.35% – 2.76%2.47%
141.13%0.71% – 1.81%1.59%
150.53%0.27% – 1.05%0.98%
160.33%0.14% – 0.78%0.57%
170.13%0.04% – 0.48%0.31%
180.13%0.04% – 0.48%0.16%
190.07%0.01% – 0.38%0.07%
200%0% – 0.26%0.03%
210%0% – 0.26%0.01%
220%0% – 0.26%0%
Chicken Road 2 · Daredevil setting
0%50%100% 118 Position on the roadProgress across these demo attempts
  • Demo attempts reaching this point
  • Range of statistical uncertainty
  • Survival under the model
Chicken Road 2 · Daredevil setting
Position on the roadDemo attempts reaching this pointRange of statistical uncertaintySurvival under the model
167.73%65.32% – 70.05%66.32%
243.07%40.58% – 45.59%43.21%
328.4%26.18% – 30.73%27.68%
418.07%16.2% – 20.09%17.27%
510.73%9.27% – 12.4%10.51%
66.13%5.03% – 7.46%6.24%
73.73%2.89% – 4.82%3.57%
82.27%1.63% – 3.15%1.96%
91.13%0.71% – 1.81%1.03%
100.6%0.32% – 1.14%0.52%
110.33%0.14% – 0.78%0.24%
120.13%0.04% – 0.48%0.11%
130.07%0.01% – 0.38%0.04%
140%0% – 0.26%0.02%
150%0% – 0.26%0.01%
160%0% – 0.26%0%
170%0% – 0.26%0%
180%0% – 0.26%0%

Work out a gross return

Chicken Road 2 · Easy setting
Position on the roadMultiplier at this positionSurvival under the modelDemo attempts reaching this pointGross return for each unit of stake
11.01×94.55%96.2%0.972
21.03×92.72%93.93%0.968
31.06×90.09%90.53%0.96
41.1×86.82%87.27%0.96
51.15×83.04%83.13%0.956
61.19×80.25%80.13%0.954
71.24×77.02%76.53%0.949
81.3×73.46%73.53%0.956
91.35×70.74%70.6%0.953
101.42×67.25%66.73%0.948
111.48×64.53%63.67%0.942
121.56×61.22%60.67%0.946
131.65×57.88%57.2%0.944
141.75×54.57%54.2%0.949
151.85×51.62%51.2%0.947
161.98×48.23%48.13%0.953
172.12×45.05%45.33%0.961
182.28×41.89%42.67%0.973
192.47×38.66%39.53%0.976
202.7×35.37%36.47%0.985
212.96×32.26%33%0.977
223.28×29.12%30.13%0.988
233.7×25.81%26.33%0.974
244.11×23.24%23.13%0.951
254.64×20.58%20%0.928
265.39×17.72%16.33%0.88
276.5×14.69%13.07%0.849
288.36×11.42%10.13%0.847
2912.08×7.91%7.13%0.862
3023.24×4.11%3.67%0.852

Gross return includes stake. Payout caps apply. No profit forecast.

Limited demo observations. No predictions. Independently unaudited.

What fairness checks involve

Chicken Road 2

Outcome generation: independently unverified by us.

Check algorithm, commitments, seeds and nonce.

Answers for this page

What should I know about the Chicken Road sequel?

It is InOut Games’ sequel with separate mode ladders and the same broad move-or-collect mechanic. The four roads contain 30, 25, 22 and 18 positions, and the provider maximum win is 20,000 USD.

Has InOut published a Chicken Road 2 RTP?

The published figure does not promise that a short session will return a fixed share of your stake.

What is the sequel’s lowest provider stake?

The lowest provider stake is 0.12 USD, within a 0.12–200 USD range. That figure does not describe a casino deposit minimum or a fixed another currency amount.

Is a longer Easy road safer on every attempt?

A longer road means more positions before its endpoint. It does not tell you how a particular next crossing will finish or make the sequence immune to early failures.

Can I cash out the practice balance to Opay?

No. Practice credits have no withdrawal value, regardless of which payment methods a casino supports. A cash withdrawal concerns a separate real-money casino balance and its conditions.

Why compare the cap with a multiplier?

Because stake multiplied by a large coefficient can exceed the provider’s 20,000 USD maximum win. Reading both together prevents an endpoint calculation being mistaken for an unrestricted payable amount.

Inside the recorded sample

How far the recorded rounds went

Fixed starting denominator. Pointwise Wilson intervals. No simultaneous curve coverage.

Attempts in the demo totals: 6,000

Chicken Road 2

Share reaching each successful step

0%25%50%75%100% 11530Position on the road Easy setting · Position on the road 1: 96.2% (95.11%–97.06%)Easy setting · Position on the road 2: 93.93% (92.61%–95.03%)Easy setting · Position on the road 3: 90.53% (88.95%–91.91%)Easy setting · Position on the road 4: 87.27% (85.48%–88.86%)Easy setting · Position on the road 5: 83.13% (81.15%–84.94%)Easy setting · Position on the road 6: 80.13% (78.04%–82.07%)Easy setting · Position on the road 7: 76.53% (74.32%–78.61%)Easy setting · Position on the road 8: 73.53% (71.24%–75.7%)Easy setting · Position on the road 9: 70.6% (68.24%–72.85%)Easy setting · Position on the road 10: 66.73% (64.31%–69.07%)Easy setting · Position on the road 11: 63.67% (61.2%–66.06%)Easy setting · Position on the road 12: 60.67% (58.17%–63.11%)Easy setting · Position on the road 13: 57.2% (54.68%–59.68%)Easy setting · Position on the road 14: 54.2% (51.67%–56.71%)Easy setting · Position on the road 15: 51.2% (48.67%–53.72%)Easy setting · Position on the road 16: 48.13% (45.61%–50.66%)Easy setting · Position on the road 17: 45.33% (42.83%–47.86%)Easy setting · Position on the road 18: 42.67% (40.19%–45.19%)Easy setting · Position on the road 19: 39.53% (37.09%–42.03%)Easy setting · Position on the road 20: 36.47% (34.07%–38.93%)Easy setting · Position on the road 21: 33% (30.67%–35.42%)Easy setting · Position on the road 22: 30.13% (27.86%–32.5%)Easy setting · Position on the road 23: 26.33% (24.17%–28.62%)Easy setting · Position on the road 24: 23.13% (21.07%–25.33%)Easy setting · Position on the road 25: 20% (18.05%–22.1%)Easy setting · Position on the road 26: 16.33% (14.55%–18.29%)Easy setting · Position on the road 27: 13.07% (11.45%–14.87%)Easy setting · Position on the road 28: 10.13% (8.71%–11.76%)Easy setting · Position on the road 29: 7.13% (5.94%–8.55%)Easy setting · Position on the road 30: 3.67% (2.83%–4.74%)Medium setting · Position on the road 1: 89.67% (88.02%–91.11%)Medium setting · Position on the road 2: 78.6% (76.45%–80.6%)Medium setting · Position on the road 3: 70.2% (67.84%–72.46%)Medium setting · Position on the road 4: 61.73% (59.25%–64.16%)Medium setting · Position on the road 5: 53.8% (51.27%–56.31%)Medium setting · Position on the road 6: 47% (44.49%–49.53%)Medium setting · Position on the road 7: 41.4% (38.93%–43.91%)Medium setting · Position on the road 8: 36.2% (33.81%–38.66%)Medium setting · Position on the road 9: 30.73% (28.45%–33.11%)Medium setting · Position on the road 10: 25.33% (23.2%–27.6%)Medium setting · Position on the road 11: 21.4% (19.4%–23.55%)Medium setting · Position on the road 12: 17.6% (15.76%–19.61%)Medium setting · Position on the road 13: 14% (12.34%–15.85%)Medium setting · Position on the road 14: 11.47% (9.95%–13.18%)Medium setting · Position on the road 15: 8.93% (7.59%–10.48%)Medium setting · Position on the road 16: 6.27% (5.15%–7.61%)Medium setting · Position on the road 17: 5.07% (4.07%–6.3%)Medium setting · Position on the road 18: 3.6% (2.77%–4.67%)Medium setting · Position on the road 19: 2.8% (2.08%–3.76%)Medium setting · Position on the road 20: 2.07% (1.46%–2.92%)Medium setting · Position on the road 21: 1.2% (0.76%–1.89%)Medium setting · Position on the road 22: 0.47% (0.23%–0.96%)Medium setting · Position on the road 23: 0.27% (0.1%–0.68%)Medium setting · Position on the road 24: 0.07% (0.01%–0.38%)Medium setting · Position on the road 25: 0% (0%–0.26%)Hard setting · Position on the road 1: 81.67% (79.63%–83.54%)Hard setting · Position on the road 2: 64.67% (62.21%–67.05%)Hard setting · Position on the road 3: 52% (49.47%–54.52%)Hard setting · Position on the road 4: 41.07% (38.6%–43.58%)Hard setting · Position on the road 5: 31.2% (28.91%–33.59%)Hard setting · Position on the road 6: 23.67% (21.58%–25.88%)Hard setting · Position on the road 7: 17.2% (15.37%–19.19%)Hard setting · Position on the road 8: 13.07% (11.45%–14.87%)Hard setting · Position on the road 9: 9.47% (8.09%–11.05%)Hard setting · Position on the road 10: 6.4% (5.27%–7.75%)Hard setting · Position on the road 11: 4.67% (3.71%–5.85%)Hard setting · Position on the road 12: 3.4% (2.6%–4.44%)Hard setting · Position on the road 13: 1.93% (1.35%–2.76%)Hard setting · Position on the road 14: 1.13% (0.71%–1.81%)Hard setting · Position on the road 15: 0.53% (0.27%–1.05%)Hard setting · Position on the road 16: 0.33% (0.14%–0.78%)Hard setting · Position on the road 17: 0.13% (0.04%–0.48%)Hard setting · Position on the road 18: 0.13% (0.04%–0.48%)Hard setting · Position on the road 19: 0.07% (0.01%–0.38%)Hard setting · Position on the road 20: 0% (0%–0.26%)Hard setting · Position on the road 21: 0% (0%–0.26%)Hard setting · Position on the road 22: 0% (0%–0.26%)Daredevil setting · Position on the road 1: 67.73% (65.32%–70.05%)Daredevil setting · Position on the road 2: 43.07% (40.58%–45.59%)Daredevil setting · Position on the road 3: 28.4% (26.18%–30.73%)Daredevil setting · Position on the road 4: 18.07% (16.2%–20.09%)Daredevil setting · Position on the road 5: 10.73% (9.27%–12.4%)Daredevil setting · Position on the road 6: 6.13% (5.03%–7.46%)Daredevil setting · Position on the road 7: 3.73% (2.89%–4.82%)Daredevil setting · Position on the road 8: 2.27% (1.63%–3.15%)Daredevil setting · Position on the road 9: 1.13% (0.71%–1.81%)Daredevil setting · Position on the road 10: 0.6% (0.32%–1.14%)Daredevil setting · Position on the road 11: 0.33% (0.14%–0.78%)Daredevil setting · Position on the road 12: 0.13% (0.04%–0.48%)Daredevil setting · Position on the road 13: 0.07% (0.01%–0.38%)Daredevil setting · Position on the road 14: 0% (0%–0.26%)Daredevil setting · Position on the road 15: 0% (0%–0.26%)Daredevil setting · Position on the road 16: 0% (0%–0.26%)Daredevil setting · Position on the road 17: 0% (0%–0.26%)Daredevil setting · Position on the road 18: 0% (0%–0.26%)
Easy settingMedium settingHard settingDaredevil setting
Recorded results by game and difficulty
GameSelected settingAttempts in the demo totalsStep one survivalRange of statistical uncertaintyCompleted roadsLargest multiplier in these attempts
Chicken Road 2 · Easy settingEasy setting1,50096.2%95.11%–97.06%5523.24×
Chicken Road 2 · Medium settingMedium setting1,50089.67%88.02%–91.11%0638.82×
Chicken Road 2 · Hard settingHard setting1,50081.67%79.63%–83.54%01,283.03×
Chicken Road 2 · Daredevil settingDaredevil setting1,50067.73%65.32%–70.05%02,235.72×

Highest successful step, including later losses. No paid prize.

Every recorded step

Chicken Road 2 · Easy setting · 1,500 rounds
Position on the roadSuccessful roundsAttempts in the demo totalsDemo attempts reaching this pointRange of statistical uncertainty
11,4431,50096.2%95.11%–97.06%
21,4091,50093.93%92.61%–95.03%
31,3581,50090.53%88.95%–91.91%
41,3091,50087.27%85.48%–88.86%
51,2471,50083.13%81.15%–84.94%
61,2021,50080.13%78.04%–82.07%
71,1481,50076.53%74.32%–78.61%
81,1031,50073.53%71.24%–75.7%
91,0591,50070.6%68.24%–72.85%
101,0011,50066.73%64.31%–69.07%
119551,50063.67%61.2%–66.06%
129101,50060.67%58.17%–63.11%
138581,50057.2%54.68%–59.68%
148131,50054.2%51.67%–56.71%
157681,50051.2%48.67%–53.72%
167221,50048.13%45.61%–50.66%
176801,50045.33%42.83%–47.86%
186401,50042.67%40.19%–45.19%
195931,50039.53%37.09%–42.03%
205471,50036.47%34.07%–38.93%
214951,50033%30.67%–35.42%
224521,50030.13%27.86%–32.5%
233951,50026.33%24.17%–28.62%
243471,50023.13%21.07%–25.33%
253001,50020%18.05%–22.1%
262451,50016.33%14.55%–18.29%
271961,50013.07%11.45%–14.87%
281521,50010.13%8.71%–11.76%
291071,5007.13%5.94%–8.55%
30551,5003.67%2.83%–4.74%
Chicken Road 2 · Medium setting · 1,500 rounds
Position on the roadSuccessful roundsAttempts in the demo totalsDemo attempts reaching this pointRange of statistical uncertainty
11,3451,50089.67%88.02%–91.11%
21,1791,50078.6%76.45%–80.6%
31,0531,50070.2%67.84%–72.46%
49261,50061.73%59.25%–64.16%
58071,50053.8%51.27%–56.31%
67051,50047%44.49%–49.53%
76211,50041.4%38.93%–43.91%
85431,50036.2%33.81%–38.66%
94611,50030.73%28.45%–33.11%
103801,50025.33%23.2%–27.6%
113211,50021.4%19.4%–23.55%
122641,50017.6%15.76%–19.61%
132101,50014%12.34%–15.85%
141721,50011.47%9.95%–13.18%
151341,5008.93%7.59%–10.48%
16941,5006.27%5.15%–7.61%
17761,5005.07%4.07%–6.3%
18541,5003.6%2.77%–4.67%
19421,5002.8%2.08%–3.76%
20311,5002.07%1.46%–2.92%
21181,5001.2%0.76%–1.89%
2271,5000.47%0.23%–0.96%
2341,5000.27%0.1%–0.68%
2411,5000.07%0.01%–0.38%
2501,5000%0%–0.26%
Chicken Road 2 · Hard setting · 1,500 rounds
Position on the roadSuccessful roundsAttempts in the demo totalsDemo attempts reaching this pointRange of statistical uncertainty
11,2251,50081.67%79.63%–83.54%
29701,50064.67%62.21%–67.05%
37801,50052%49.47%–54.52%
46161,50041.07%38.6%–43.58%
54681,50031.2%28.91%–33.59%
63551,50023.67%21.58%–25.88%
72581,50017.2%15.37%–19.19%
81961,50013.07%11.45%–14.87%
91421,5009.47%8.09%–11.05%
10961,5006.4%5.27%–7.75%
11701,5004.67%3.71%–5.85%
12511,5003.4%2.6%–4.44%
13291,5001.93%1.35%–2.76%
14171,5001.13%0.71%–1.81%
1581,5000.53%0.27%–1.05%
1651,5000.33%0.14%–0.78%
1721,5000.13%0.04%–0.48%
1821,5000.13%0.04%–0.48%
1911,5000.07%0.01%–0.38%
2001,5000%0%–0.26%
2101,5000%0%–0.26%
2201,5000%0%–0.26%
Chicken Road 2 · Daredevil setting · 1,500 rounds
Position on the roadSuccessful roundsAttempts in the demo totalsDemo attempts reaching this pointRange of statistical uncertainty
11,0161,50067.73%65.32%–70.05%
26461,50043.07%40.58%–45.59%
34261,50028.4%26.18%–30.73%
42711,50018.07%16.2%–20.09%
51611,50010.73%9.27%–12.4%
6921,5006.13%5.03%–7.46%
7561,5003.73%2.89%–4.82%
8341,5002.27%1.63%–3.15%
9171,5001.13%0.71%–1.81%
1091,5000.6%0.32%–1.14%
1151,5000.33%0.14%–0.78%
1221,5000.13%0.04%–0.48%
1311,5000.07%0.01%–0.38%
1401,5000%0%–0.26%
1501,5000%0%–0.26%
1601,5000%0%–0.26%
1701,5000%0%–0.26%
1801,5000%0%–0.26%
Test limits

Demo observations. No forecasts. No independent RTP audit.

Titles on Chicken Road Wins

Chicken Road

Chicken Road

RTP stated by the developer: 98% · Upper payout amount: 10,000 USD · Naira for your personal budget: NGN (₦); USD amounts describe the provider's game limits

Read before choosing your stake

Chicken Road 2

  • Read game title and provider.
  • Try controls in the browser.
  • Collect now or attempt another step.
  • Check stakes and cap in-game.

Four settings side by side

Chicken Road 2

Easy setting

Total positions on the road
30
Multiplier after the opening move
1.01×
Multiplier at the far end
23.24×
What can end a round
No figure to display

Medium setting

Total positions on the road
25
Multiplier after the opening move
1.08×
Multiplier at the far end
2,457×
What can end a round
No figure to display

Hard setting

Total positions on the road
22
Multiplier after the opening move
1.18×
Multiplier at the far end
62,162.09×
What can end a round
No figure to display

Daredevil setting

Total positions on the road
18
Multiplier after the opening move
1.44×
Multiplier at the far end
3,608,855.25×
What can end a round
No figure to display

Amounts at each position

Chicken Road 2

Easy setting · 30 Total positions on the road
Position on the road 1
1.01×
Position on the road 2
1.03×
Position on the road 3
1.06×
Position on the road 4
1.1×
Position on the road 5
1.15×
Position on the road 6
1.19×
Position on the road 7
1.24×
Position on the road 8
1.3×
Position on the road 9
1.35×
Position on the road 10
1.42×
Position on the road 11
1.48×
Position on the road 12
1.56×
Position on the road 13
1.65×
Position on the road 14
1.75×
Position on the road 15
1.85×
Position on the road 16
1.98×
Position on the road 17
2.12×
Position on the road 18
2.28×
Position on the road 19
2.47×
Position on the road 20
2.7×
Position on the road 21
2.96×
Position on the road 22
3.28×
Position on the road 23
3.7×
Position on the road 24
4.11×
Position on the road 25
4.64×
Position on the road 26
5.39×
Position on the road 27
6.5×
Position on the road 28
8.36×
Position on the road 29
12.08×
Position on the road 30
23.24×
Medium setting · 25 Total positions on the road
Position on the road 1
1.08×
Position on the road 2
1.21×
Position on the road 3
1.37×
Position on the road 4
1.56×
Position on the road 5
1.78×
Position on the road 6
2.05×
Position on the road 7
2.37×
Position on the road 8
2.77×
Position on the road 9
3.24×
Position on the road 10
3.85×
Position on the road 11
4.62×
Position on the road 12
5.61×
Position on the road 13
6.91×
Position on the road 14
8.64×
Position on the road 15
10.99×
Position on the road 16
14.29×
Position on the road 17
18.96×
Position on the road 18
26.07×
Position on the road 19
37.24×
Position on the road 20
53.82×
Position on the road 21
82.36×
Position on the road 22
137.59×
Position on the road 23
265.35×
Position on the road 24
638.82×
Position on the road 25
2,457×
Hard setting · 22 Total positions on the road
Position on the road 1
1.18×
Position on the road 2
1.46×
Position on the road 3
1.83×
Position on the road 4
2.31×
Position on the road 5
2.95×
Position on the road 6
3.82×
Position on the road 7
5.02×
Position on the road 8
6.66×
Position on the road 9
9.04×
Position on the road 10
12.52×
Position on the road 11
17.74×
Position on the road 12
25.8×
Position on the road 13
38.71×
Position on the road 14
60.21×
Position on the road 15
97.34×
Position on the road 16
166.87×
Position on the road 17
305.94×
Position on the road 18
595.86×
Position on the road 19
1,283.03×
Position on the road 20
3,267.64×
Position on the road 21
10,898.54×
Position on the road 22
62,162.09×
Daredevil setting · 18 Total positions on the road
Position on the road 1
1.44×
Position on the road 2
2.21×
Position on the road 3
3.45×
Position on the road 4
5.53×
Position on the road 5
9.09×
Position on the road 6
15.3×
Position on the road 7
26.78×
Position on the road 8
48.7×
Position on the road 9
92.54×
Position on the road 10
185.08×
Position on the road 11
391.25×
Position on the road 12
894.28×
Position on the road 13
2,235.72×
Position on the road 14
6,096.15×
Position on the road 15
18,960.33×
Position on the road 16
72,432.75×
Position on the road 17
379,632.82×
Position on the road 18
3,608,855.25×